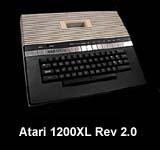
ATARI 1200XL OS MODIFICATION #1 (Modify to Atari
800 OS):
This mod was created by Brent Borghese of the ACE of Columbus, Ohio.
Updated by Curt Vendel of Atari Historical Museum.
Follow these simple instructions
to replace the nasty 1200XL OS with
the more favorable Atari 400/800 OS.
1. Pull the Rev.B ROMs out of
the motherboard of a 400, or from the
10K ROM board of an 800. Make sure that the chips
function properly!
2. If you can't find a set of
ROMs, order them from:
B&C Computervisions: Atari Sales & Service
916-295-9270
BEST Electronics
408-243-6950
3. At this point you should have
three chips, marked C012399B,
C012499B and C014599B, respectively.
4. Place the C014599B piggyback
on the C012499B chip with the
notched ends facing the same direction. Solder pin 1
to pin 1, pin 2 to
pin 2, etc. for all 24 pairs of pins.
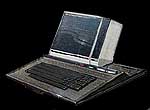
5. Open the 1200XL using a small
Phillips-head driver on the screws,
and a needlenose pliers to pull the pop rivets that
hold the RF shield
together. This step is completely non-destructive:
there is nothing to
cut, unsolder or mutilate.
6. Locate the two 24-pin ROM
chips on the 1200XL board near the
cartridge slot. Notice that they are marked U12 and
U13, respectively,
in white letters on the board. Notice also which way
the notched ends
of the chips are facing.
7. Remove these ROM chips and
give them to someone you don't like.
8. Pop the chip marked C012399B
into the slot marked U12, with the
notch facing in the proper direction. Place the
piggyback chips in slot
U13, with the notches properly oriented.
9. Test the board before putting
the 1200XL together again.
You now have an 800 with a 1200
keyboard, the best of both worlds.
OS
Modification #2 (800XL OS & Basic upgrade):
Condensed OS/BASIC upgrade instructions for 1200XL (originally posted by
Bob Woolley)
Modified by Adam Brannon using procedures used in AtariMax�s 32in1 OS
Upgrade
Parts
needed
1-XL/XE OS
(CO61598B)
1-XL/XE
MMU (CO61618)
1-2764
EPROM (Programmed with BASIC RevC)
2-28 pin
sockets
2- 5�
length wire (wire wrap type)
1. Remove
the current 1200XL OS roms at U12 & U13
2.
Desolder and remove 24 pin sockets at U12 & U13
3. Make
sure all 28 pin sites at U12 & U13 are cleared of solder. Install and
solder 28 pin sockets at U12 & U13
4. Remove
the jumper at W6. Set aside for later.
5. Remove
current MMU at U14 (CO60609). Replace with XL/XE MMU (CO61618)
6. Remove
all jumpers except W11, W12 and W13
7. Solder
wire from pin 18 of U14 (MMU) to pin 11 of U23 (PIA)
8. Solder
wire from pin 23 of U21 (CPU) to the top pad of W6
9. Install
XL/XE OS at U13
10.
Install programmed 2764 at U12. Make sure pin 26 is lifted or removed.
11. Bonus
Mod!! Locate R63 near SIO connector. Remove R63 and replace with jumper
removed from W6. You now have +5 to the SIO for using SIO powered
hardware not normally compatible with the 1200XL.
Put
everything back together and test by booting without a drive attached.
If the upgrade went right, you should see the READY prompt. Type PRINT
PEEK(43234) and press return. A value of �234� should be returned. This
tells you that the revision of BASIC is C.
You now
have a fully 600XL/800XL compatible 1200XL with built in BASIC. Enjoy!!
|